
The installation of an exterior sign on a Listed Historical Resource needs a heritage permit. Plans for signs must be consistent with the Standards and Guidelines for the Conservation of Historic Places in Canada (PDF, 6.9MB). This page provides a summary of the standards and guidelines related to signage.
Note: New signs must also meet other requirements. Refer to our page on sign permits for more information.


Guidelines
Research the Listed Historical Resource
- Learn about the building’s heritage value and its character-defining elements.
- Review historic reports and photographs that describe and show historic signs.
- Check the building to see if there are physical traces of historic signs.
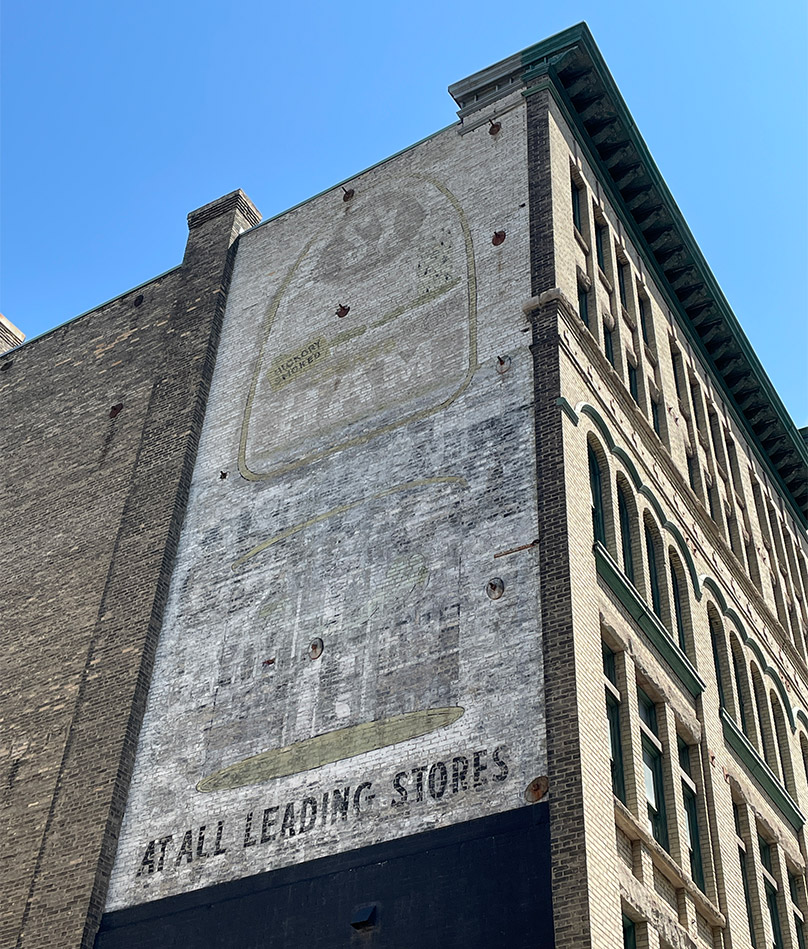
Historic signs
- Some signs on Listed Historical Resources are protected. Avoid removing or modifying these.
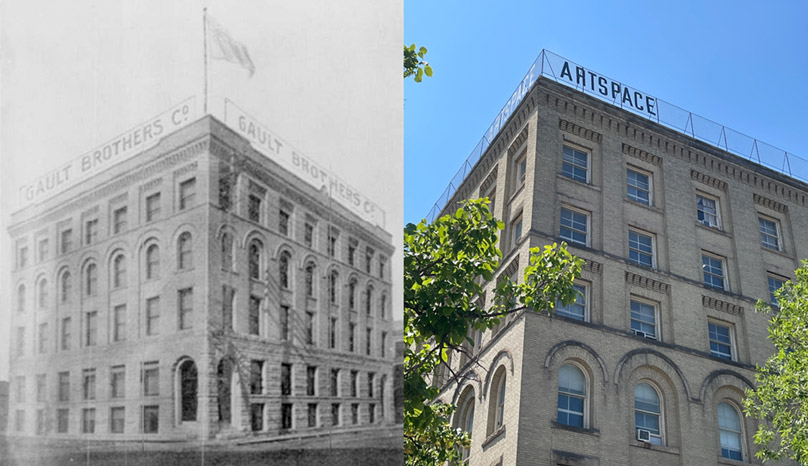
- Examples of historic sign forms include: rooftop sign fences, painted ‘ghost’ signs, awnings, and stamped or carved masonry with building identification.
- Keep existing painted-on signage as is, even if it has faded. Do not repaint these to make them look new. Other historic sign forms may be restored through a heritage permit.
Sign uses and forms
- A sign can be used for business or building identification.
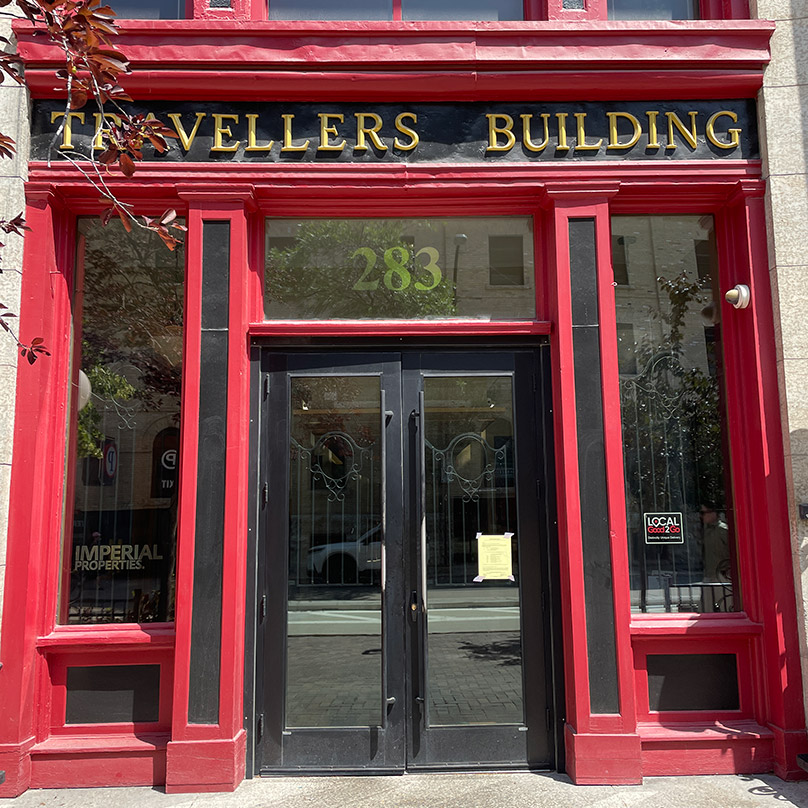
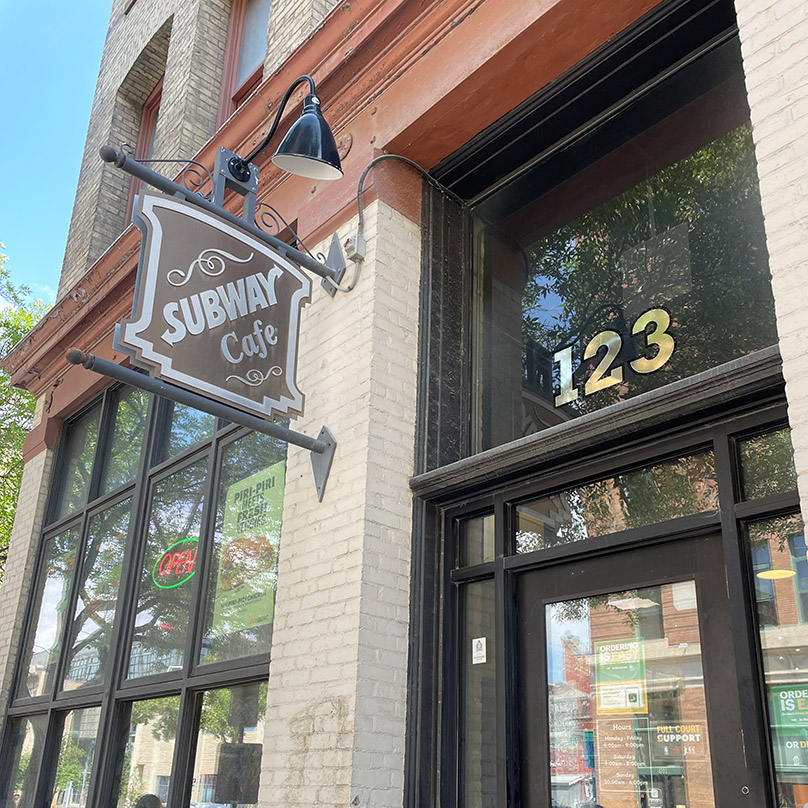
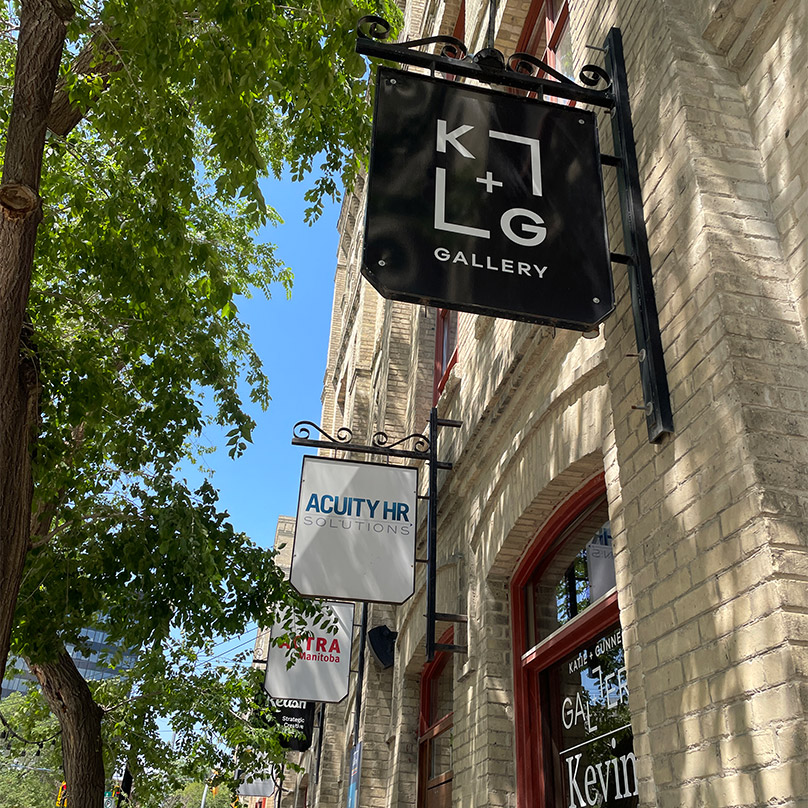
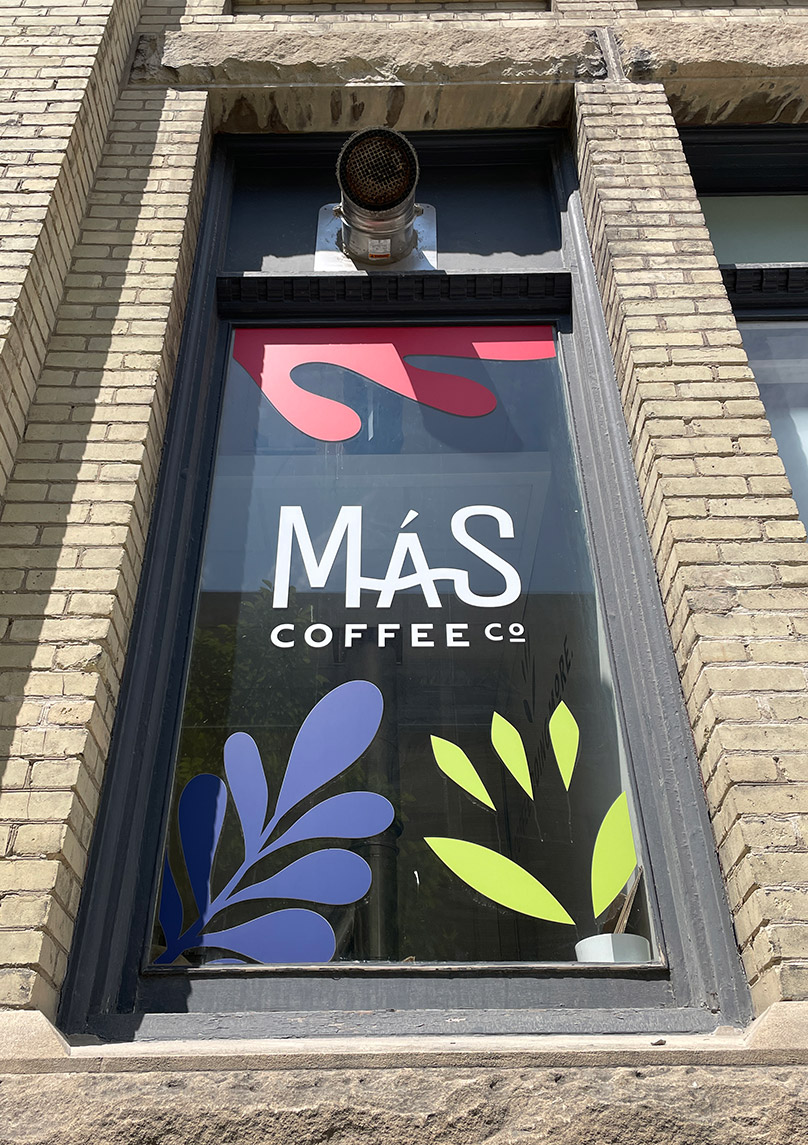
- New sign forms should draw from traditional ones and may include: fascia signs, pin-mounted letter signs, projecting blade signs, awnings, banners, and applied window decals. Internally illuminated channel letters and light boxes are not common sign forms for Listed Historical Resources unless the building is from the mid to late 20th century.
- Select a sign form that suits the building’s heritage value and character-defining elements and that works for the intended purpose of the sign.
- Digital signs on Listed Historical Resources are not allowed.
Minimal intervention
- Apply this standard to all aspects of the sign design.
Visual appearance
- Make the new sign visually compatible with the Listed Historical Resource.
- Consider recreating a missing historic sign based on physical or documentary evidence.
- Design the sign so that its form, materials, and colours fit with the era and architectural features of the building.
- Use materials that will withstand the test of time such as metal or painted wood. Avoid large spans of acrylic or plastic products.
- Avoid sign clutter. Keep the amount of signage to a minimum.
- Unless your business has multiple entrances or tenants, one sign near the main entrance is all you need. If there are multiple tenants in a building, consider a sign strategy that uses a series of similar signs or a sign directory.
Subordination to the Listed Historical Resource
- Ensure that the sign isn’t flashy or obtrusive. It shouldn’t overwhelm or detract from the Listed Historical Resource or its character-defining elements.
- The size of the sign must be appropriately scaled for the building and for the people who will be viewing it.
- Business identification signs are scaled to be viewed by pedestrians.
- Building identification signs can be larger so they can be viewed from a distance. However, if a building sign is located above a main entrance, it should be scaled for pedestrians.
- Size also impacts installation requirements. Smaller signs need fewer anchoring points, which is gentler on the Listed Historical Resource.
Installation methods
- Make the new sign physically compatible with the Listed Historical Resource. Use installation methods and materials that are minimally invasive. Do not remove, damage, or destroy character-defining elements of the building to accommodate the sign installation.
- If the sign is installed on a masonry wall, set the anchors into mortar joints. Do not penetrate brick or stone units with anchors. Size the anchors so that they are smaller than the mortar joints. Use existing anchor holes if possible.
- Design the frame of a sign to be a permanent installation that can be reused if a business changes. The sign face should be interchangeable. This results in fewer interventions to the Listed Historical Resource.
- For pin-mounted letter signs, mount individual letters on a backer panel that can be installed onto the building. This will reduce the number of penetrations.
- Sign installation should be reversible. This means that if the sign is removed in the future, the area can be easily repaired.
- Ensure that any materials that abut or penetrate the building are rust proof. Materials should not stain or cause harmful reactions with historic building materials.
- Window decals can be used as a non-invasive alternative. These don’t need a heritage permit. Decals that cover less than 50 percent of a windowpane are exempt from other permit requirements.
Lighting
- If possible, avoid illuminated signs. Running electrical cables and adding light fixtures adds to the number of interventions.
- If lighting is necessary, use methods, fixtures, and colour temperatures that are compatible with the building.
- External illumination refers to adding a light fixture above an opaque sign to light it. This type of lighting would be fitting for an early 20th century building.
- Internal illumination means backlighting a translucent sign face. This type of sign would be more fitting for a mid or late 20th century building.
Location
- Place the sign where a historic sign existed. If there is no evidence of a historic sign, place the sign in an appropriate area such as within a designated sign band above an entrance or on a pilaster next to a doorway.
- Do not hide a character-defining element of the building.
- Business signs are usually located near the top of the main floor of a building.
- Building signs are usually located near the roofline of a building. A building sign can also be above the main entrance.
Murals
- Do not paint a mural directly on a Listed Historical Resource.
- Apply a mural to removable panels and install these using vertical strapping.
- Place a mural on a plain wall that doesn’t face a street.